Making Interactive Measurements
This tutorial demonstrates interactively (and quickly) measuring the distance between features in QGIS using the Measure tool from the Attributes Toolbar.
This tool will “snap” to features and describe various measurements, so long as snapping is enabled.
Included in this tutorial:
Enabling snapping to features
Accessing the Measure tool for interactive measurements
Using the Measure tool, with an example
Software version in examples: QGIS-LTR 3.40.5-Bratislava
Tutorial Data: The tutorial includes demonstration with sample data available here.
Credits: Sally Kaye and L. Meisterlin (2025)
Enabling Snapping
Under the Project tab, click Snapping Options. Click the magnet icon to enable snapping.
navigating to the Snapping Toolbar
You can select which types of features to snap to and change the snapping tolerance by pixel in the Snapping settings.
viewing features and snapping tolerance options
TIP: to make the Snapping Toolbar easily accessible, you can add it to the main banner by clicking the View tab, hovering over Toolbars, and selecting Snapping Toolbar.
Accessing the Measure tools
Click the dropdown arrow next to the Measure tool in the Attributes Toolbar to unroll options for interactively measuring line, area, bearing, and angle.
accessing Measure options
Using the Measure tools (with example)
Choosing one of the Measure tools summons the Measure dialogue box. In the example screenshot below, we have chosen Measure Line (distance).
In the Measure dialogue box, indicate whether to measure cartesian (flat) or ellipsoidal distance. Indicate distance units (options include meters, kilometers, feet, yards, miles, inches, etc.).
You can hover over a point, vertex, edge, or other detected feature to get an accurate measurement. Select the point, vertex, or edge by clicking it.
In the example below, the tool is measuring distance in feet on a cartesian surface. The dialogue box displays the total measurement: 5536.825 feet. Segment measurements can also be found in the dialogue box under Segments [feet].
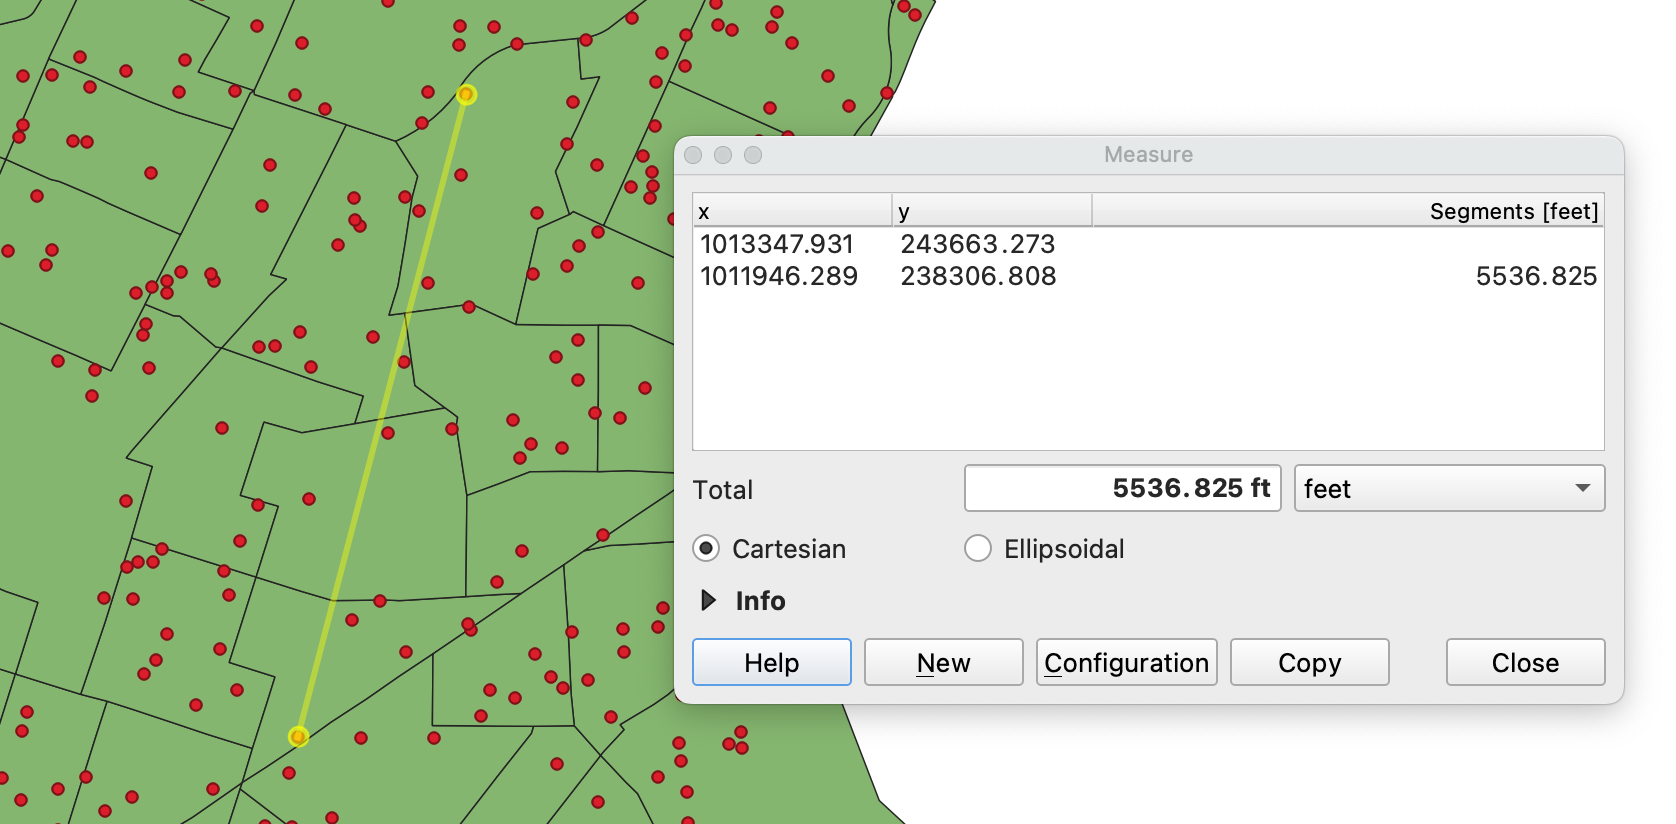
an example of the Measure tool, measuring distance in feet on a cartesian surface
You can use this tool to measure individual distances as well as combined segments (if, for example, you wanted to measure multiple distances that sum to describe a route). Click on the next point, vertex, or edge to add a segment to the measurement. Right-click to stop adding segments, and right-click again to clear selections.